This article describes the steps for adding a temporary Calculated field from the Table View of a Form.
Calculated fields are used for quick calculations based on the collected Records and viewing the results directly in the Table View.
You can add a Calculated field and make additional calculations using the Table View. Adding a Calculated field creates a temporary new column in the Table View and can be exported when you export the Records.
How to add a Calculated field in Table view
To add a temporary Calculated field to your Form from Table View, follow these steps:
- Navigate to the Table View of your Form.
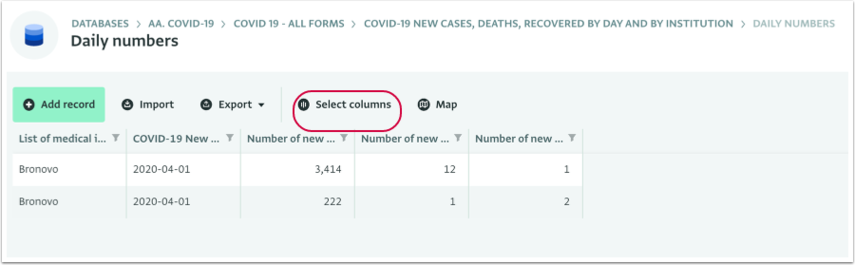
- Click “Select columns.”
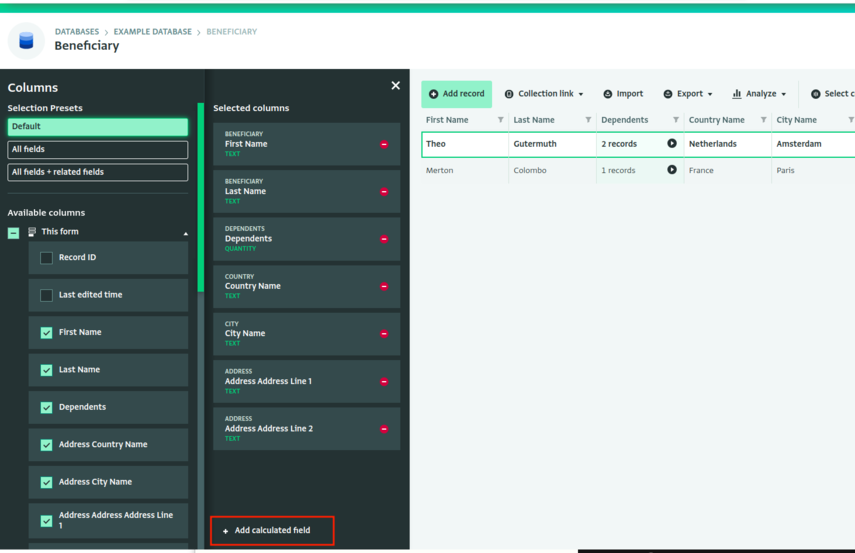
- Click “Add calculated field” in the Columns side panel.
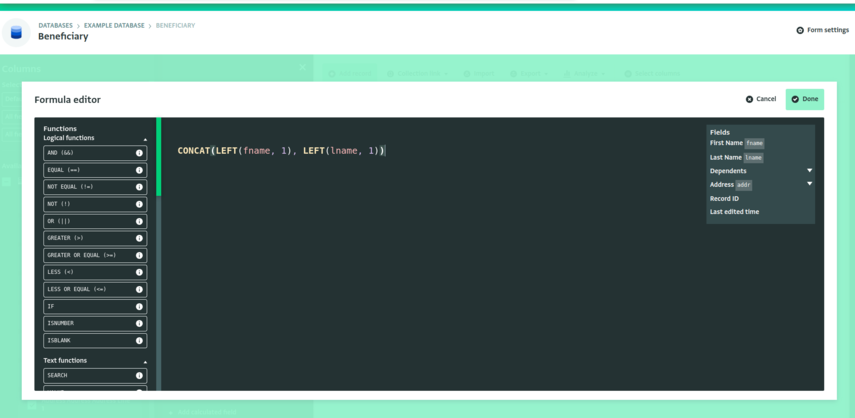
- Type your Formula in the Formula editor and click “Done.”
For more information on how to write Formulas, see Record context.
- Select the Calculated field column to rename it.
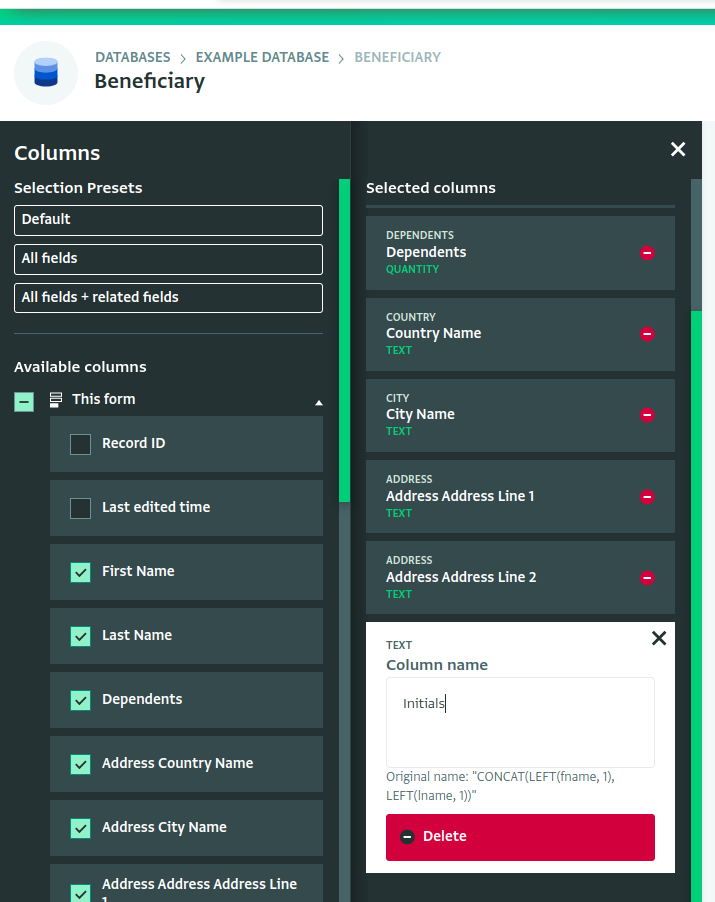
- Apply the changes by clicking the 'X' on the Columns side panel.
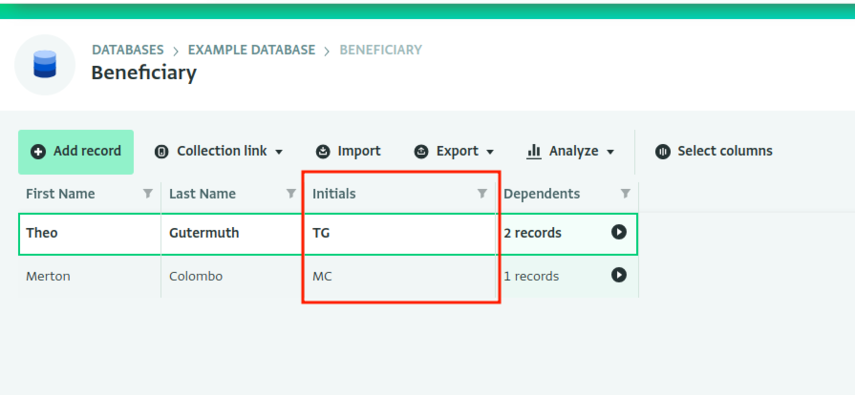
The Calculated field is visible in the Table View of the Form.