When you have finished building your Dashboard in PowerBI Desktop, you can publish it to PowerBI Online, where you can share it privately or publically. You can also schedule regular refreshes so that your dashboard is synced automatically synced with the data in ActivityInfo.
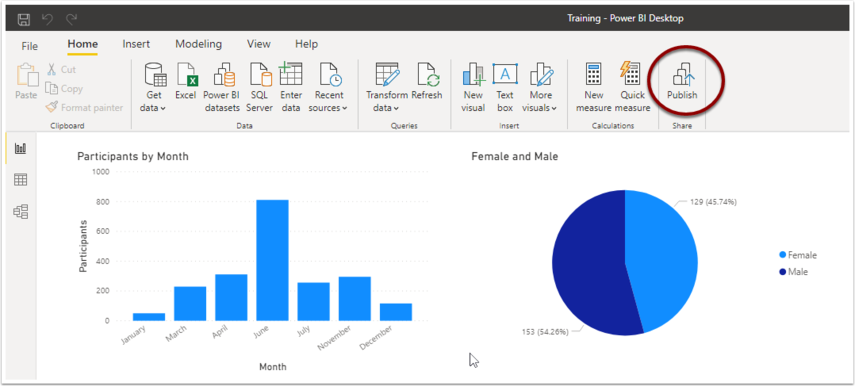
Start in PowerBI desktop, by "Publishing" your dashboard:
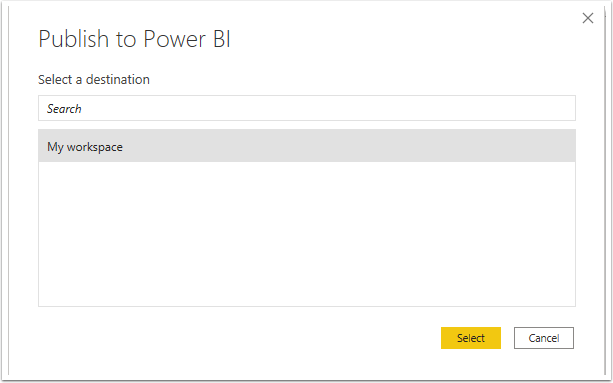
Choose the PowerBI Online workspace to which the report should be saved, then click "Select." By default, this will be "My workspace"
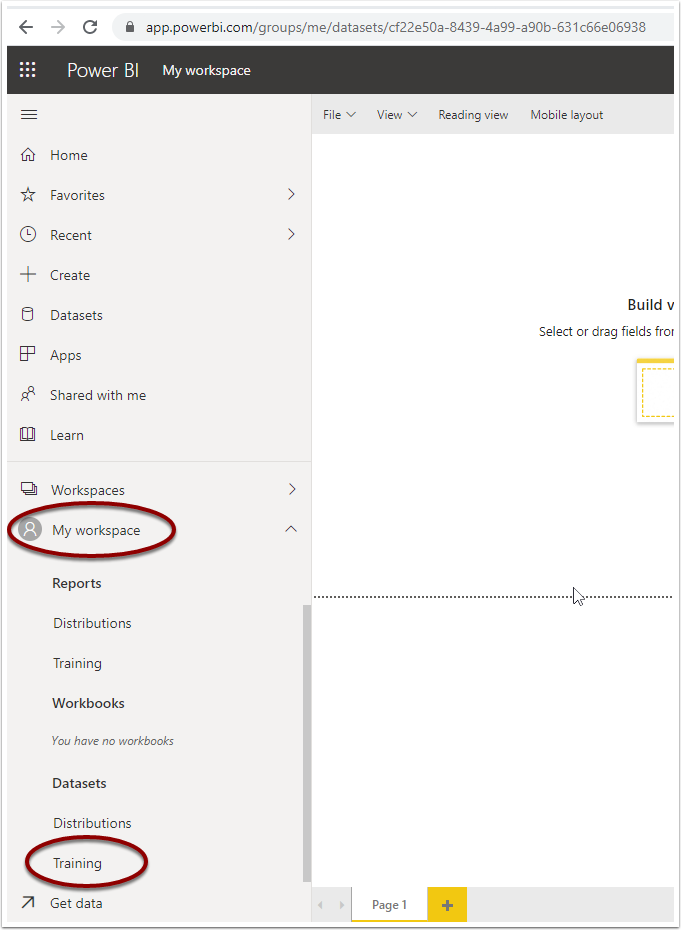
Once publishing is complete, open PowerBI Online and find the workspace to which you've saved the report. Scroll down to the "Datasets" section and locate the Dataset you've just published. It will have the same name as the filename of the PowerBI Dashboard file.
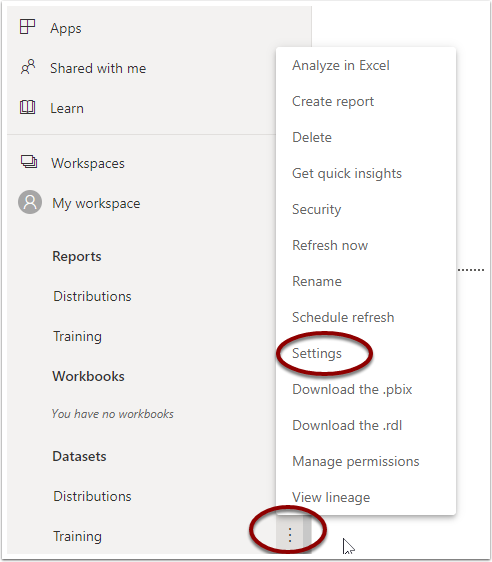
Hover with your mouse over the Dataset item, and then click the three vertical dots to open the menu. Choose "Settings"
Expand the "Data source credentials" section. You should see a list of credentials, one for each form you included from ActivityInfo:
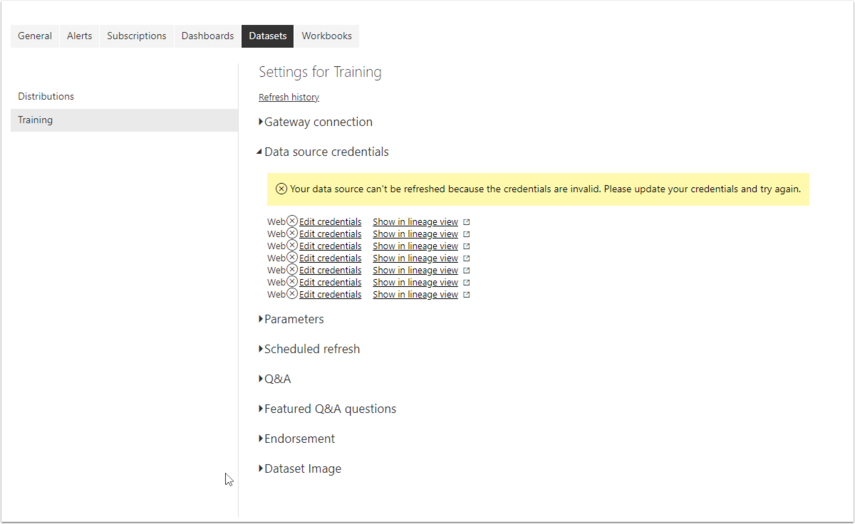
Click on each of the "Edit credentials" links and choose "Basic" as the authentication method. Enter "user" or any other text in the user name and paste a read-only API token into the password field. Then click "Sign in".
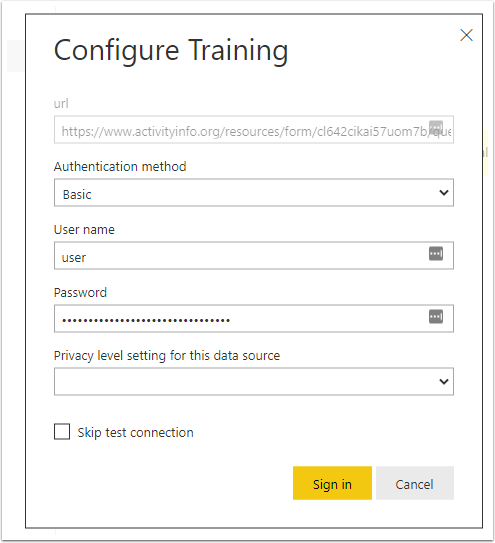
You will need to repeat this step for each credential listed in the settings page.